


Today, I wanna talk about how I built an indoor RC track. It’s a pretty cool project, and I think you guys might find it interesting.
So, first off, I had to figure out where to put this thing. I mean, you need a decent amount of space for an RC track. Luckily, I had this spare room in my house that wasn’t really being used for anything important. It was about 100 feet by 50 feet, which I figured was good enough. The idea is to have fun with my RC car no matter how bad the weather is outside.
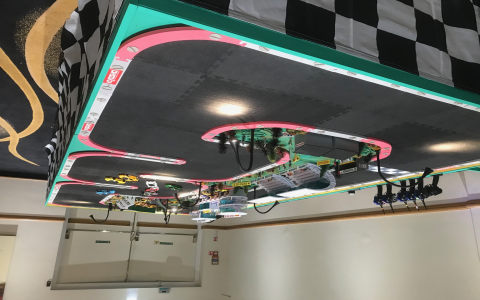
Once I had the location sorted, I started thinking about the track itself. I wanted it to be challenging but not so crazy that I’d be constantly crashing my car. So, I sketched out a simple layout with some turns, a few jumps, and a straightaway where I could really open up the throttle.
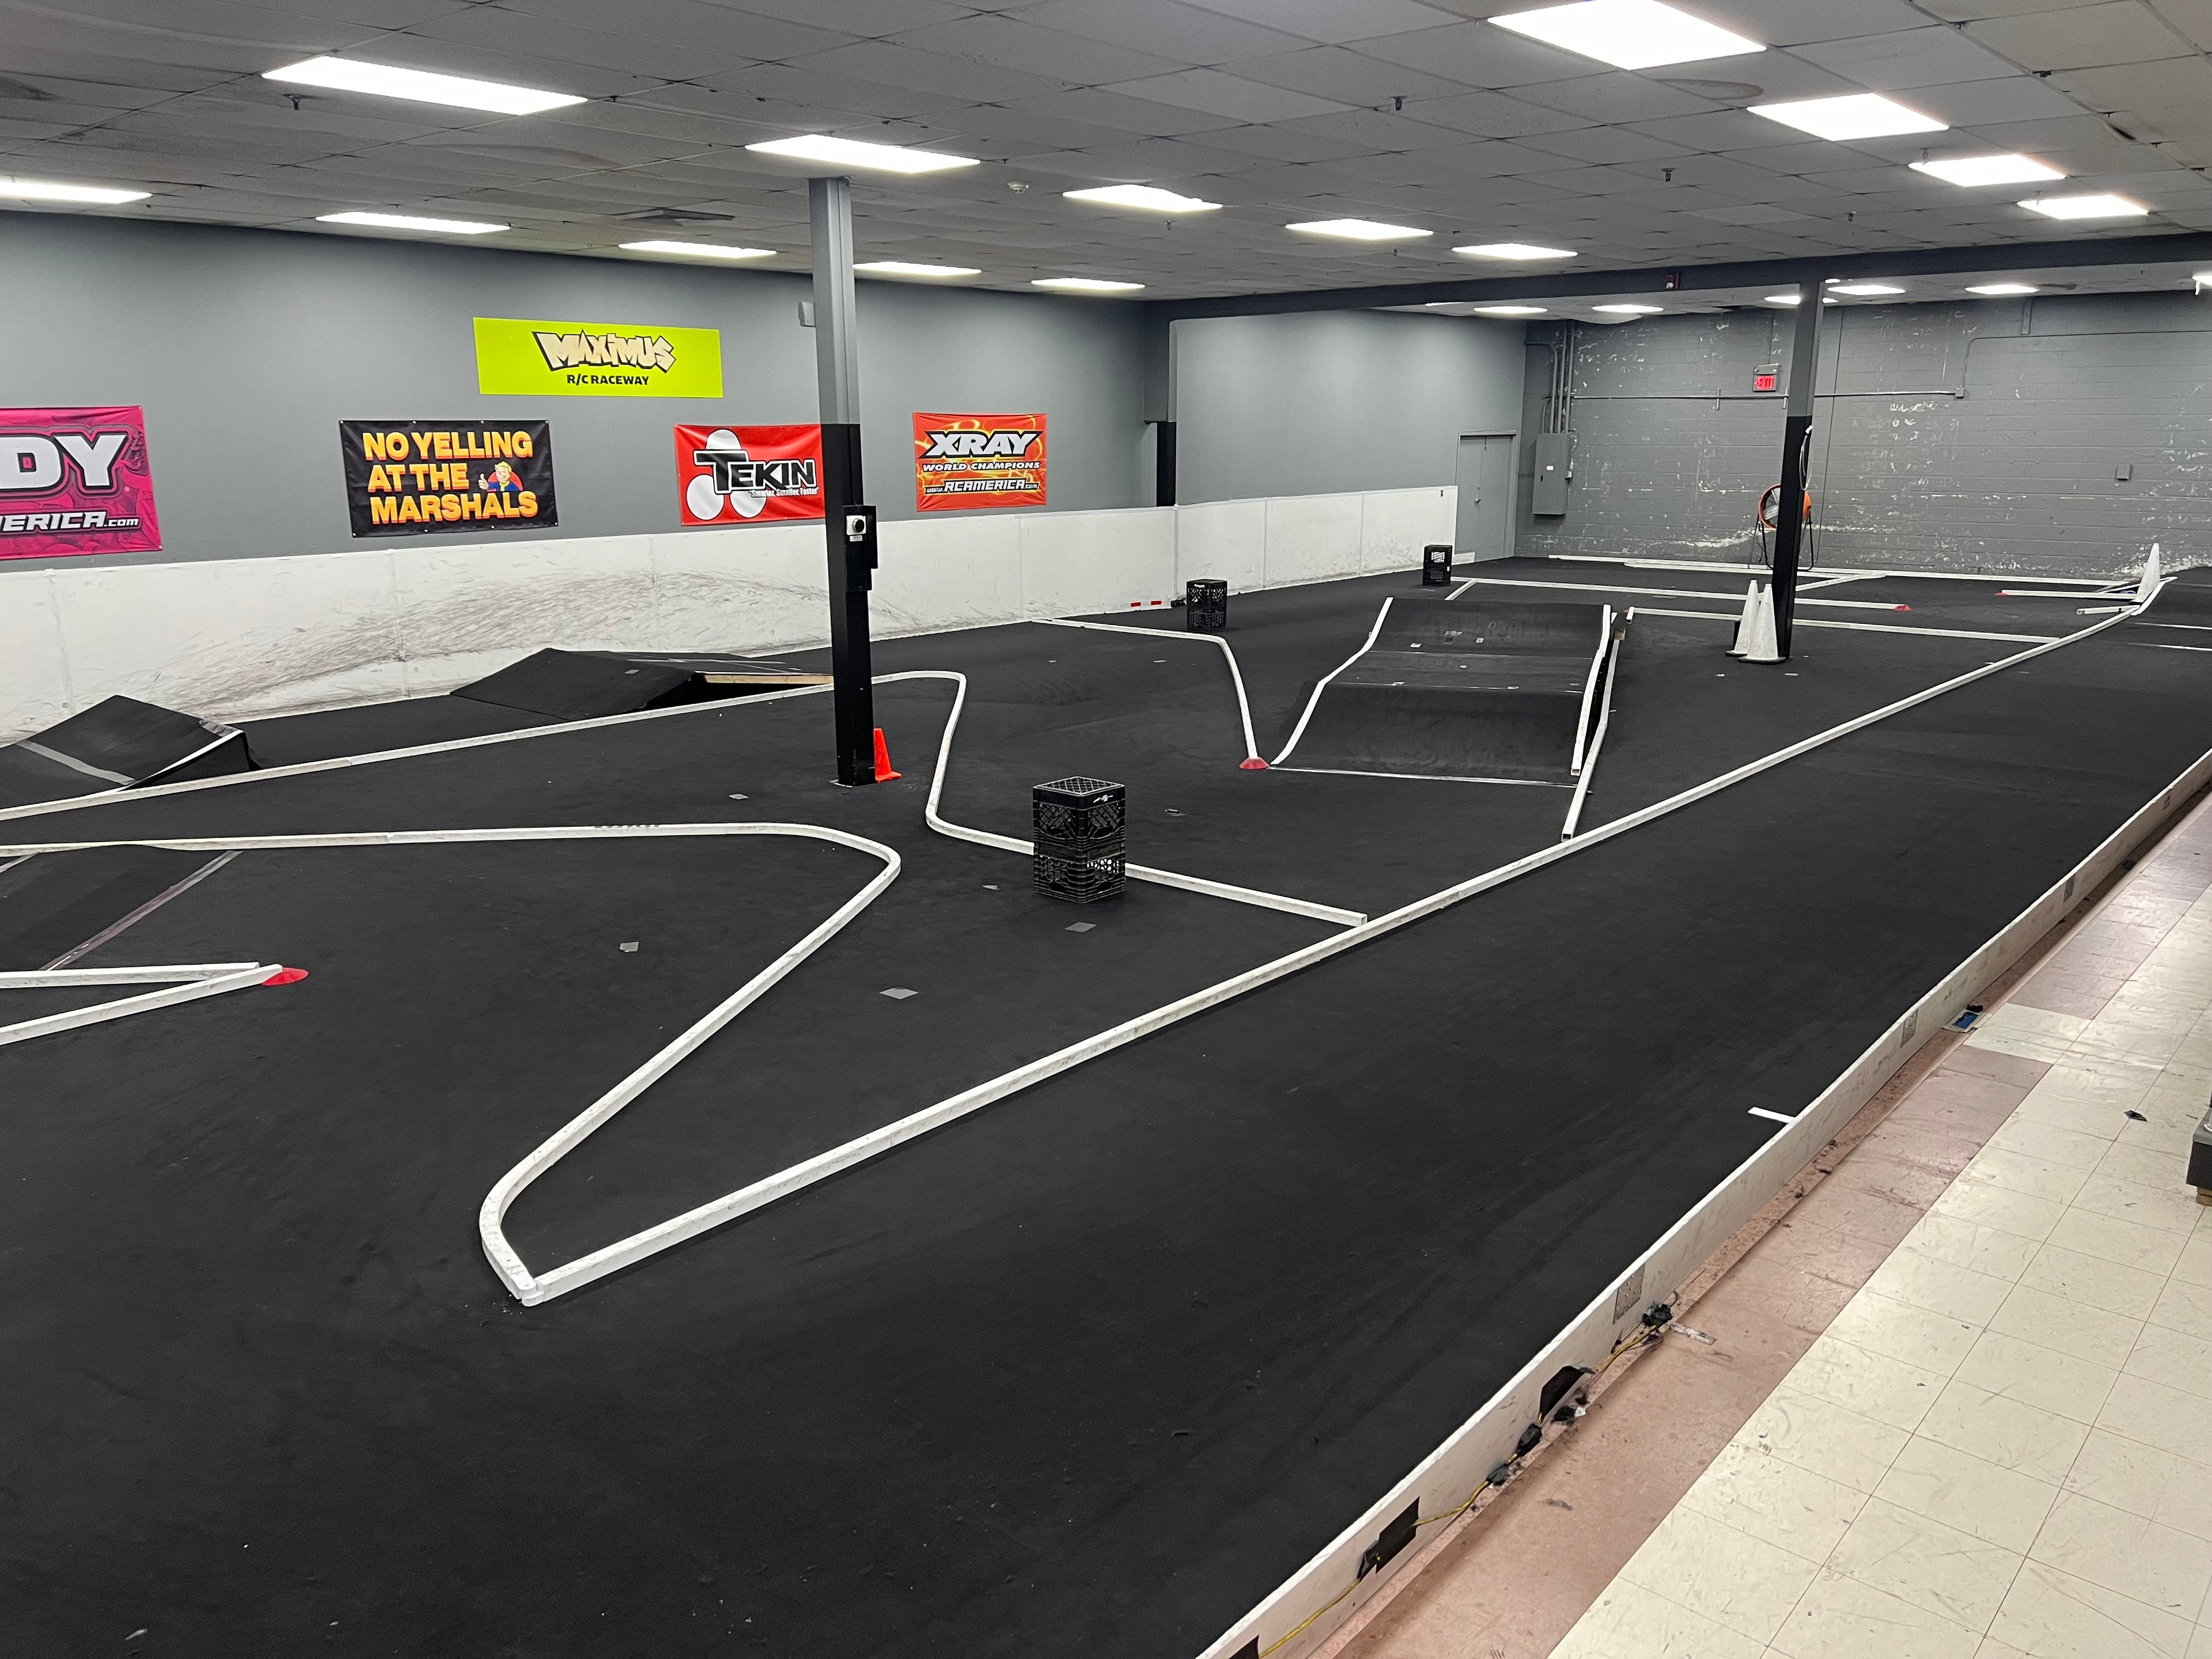
Next up was actually building the thing. I used some plywood sheets to create the basic shape of the track and some wooden beams to elevate certain sections. It was a bit of a trial-and-error process, I won’t lie. I had to adjust the heights of the jumps a few times to get them just right. And let me tell you, cutting those plywood sheets was a workout in itself!
- Design: Sketch out your track layout.
- Build: Use plywood and wooden beams to create the track.
- Adjust: Modify jump heights and turns as needed.
After getting the basic structure down, I added some dirt to make it feel more like an off-road track. That was messy, but also kind of fun. Getting your hands dirty is part of the process, right? I also put up some barriers along the edges of the track to keep the car from flying off into the walls. Safety first, people!
The final touch was a driver’s stand. I built a little platform, about 8 feet tall, so I could have a good view of the entire track while driving. It’s not super fancy, but it does the job. I even added a little railing so I wouldn’t accidentally take a tumble while getting too into the race.
The Finishing Touches
With the track built, I spent some time decorating. I found some old banners and flags to hang up, giving the room a bit of a racing vibe. It’s all about the atmosphere, you know? I also set up some basic lighting so I could use the track even when it’s dark outside. Who needs sunlight when you have RC cars, am I right?
- Decorate: Add banners and flags for a racing vibe.
- Lighting: Install lights for nighttime use.
And there you have it – my very own indoor RC track. It was a lot of work, but totally worth it. I’ve spent hours on this thing already, racing against friends or just practicing my driving skills. It’s a blast! If you’re into RC cars and have some extra space, I highly recommend giving this a try. It is a great way to have fun with your cars even though the weather is bad. You will have great fun for sure!
Thanks for reading, and happy racing!


