


Okay, folks, gather ’round. I wanna share my little adventure with making psilocybin liquid culture. It’s been a wild ride, and I’ve learned a ton along the way. So, let’s dive right in, shall we?
Getting Started
First off, I had to get my hands on some spores. It’s like the starting point of this whole operation. Think of it as planting a seed, but way cooler. I got mine from a legit place, don’t worry. It’s super important to get spores from a reputable source to avoid any nasty surprises down the line. I mean, you don’t want to end up growing some random mold, right?
Prepping the Gear
Next up, I had to gather all my supplies. It felt like I was gearing up for some kind of science experiment, which, I guess, it kinda was. I got myself some jars, you know, the ones with the lids that seal tight. Then there was the pressure cooker, which is basically a must-have to sterilize everything. And, of course, I needed some nutrients for the little guys to feed on. I went with a simple mix of honey and water. Simple, yet effective.

Sterilization is Key
This part is crucial. You gotta make sure everything is squeaky clean. I’m talking hospital-grade clean. I loaded up my jars with the nutrient solution and popped them into the pressure cooker. It’s like giving them a nice, hot bath that kills off any unwanted guests. I let it do its thing for about an hour, just to be safe. Better safe than sorry, as they say.
Inoculation Time
Once everything cooled down, it was time for the main event. I carefully injected the spore solution into the jars, using a sterile syringe, of course. This felt like the most delicate part of the whole process. One wrong move and you could contaminate the whole batch. But, I took my time, kept a steady hand, and managed to get it done without a hitch.
Waiting Game
Now came the hard part: waiting. It’s like watching paint dry, but way more exciting. I stored the jars in a dark, room-temperature spot and just…waited. Every day, I’d peek at them, looking for any signs of growth. It was agonizing, but also kinda thrilling. And then, one day, I saw it: little white fluff balls starting to form. Mycelium!
Seeing Results
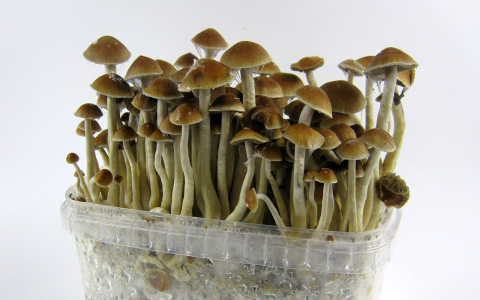
- After a few weeks, the jars were fully colonized.
- It looked like a fluffy white cloud had taken over.
- That’s when I knew I had successfully made liquid culture.
- I felt like a proud parent, watching my little mycelium babies grow up.
Final Thoughts
Honestly, this whole process was a blast. It was a bit challenging at times, but totally worth it in the end. I learned a lot about patience, precision, and the amazing world of fungi. Plus, now I have a sustainable source of mycelium for future experiments. If you’re thinking about trying this out, I say go for it! Just remember to do your research, be meticulous, and have fun with it. It’s a journey of discovery, and who knows what you might find along the way. So yeah, that’s my story. Hope you enjoyed it, and maybe even learned a thing or two. Stay curious, my friends!


