


Okay, folks, let’s dive into this air fryer tri-tip adventure I embarked on. I’d heard whispers of juicy, perfectly cooked tri-tip coming out of these countertop wonders, and I had to put it to the test.
First things first, I grabbed a decent-looking tri-tip from the grocery store. Nothing fancy, just a regular one, about 2.5 pounds. I unwrapped it and patted it dry with some paper towels. Gotta get that surface nice and dry for a good sear.
Seasoning Time
Next up, the seasoning. I’m a simple guy, so I went with a basic mix:
- Salt (plenty of it!)
- Black pepper (freshly cracked, of course)
- Garlic powder
- Onion powder
- A pinch of smoked paprika for a little extra somethin’ somethin’.
I mixed all that up in a small bowl and rubbed it generously all over the tri-tip. Really massaged it in there, making sure every nook and cranny was covered.
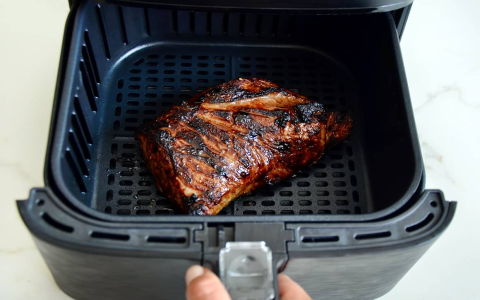
Into the Air Fryer
Then, I preheated my air fryer to 400°F. While that was warming up, I drizzled a tiny bit of olive oil on the tri-tip – just enough to help the crust develop. Once the air fryer was ready, I carefully placed the tri-tip inside the basket.
I set the timer for 25 minutes, I flip it after 15minutes.I figured I’d check the internal temperature after that and see where we were at.
After 25,I use my thermometer to check the temperature,It’s about 135°*!
Rest and Slice
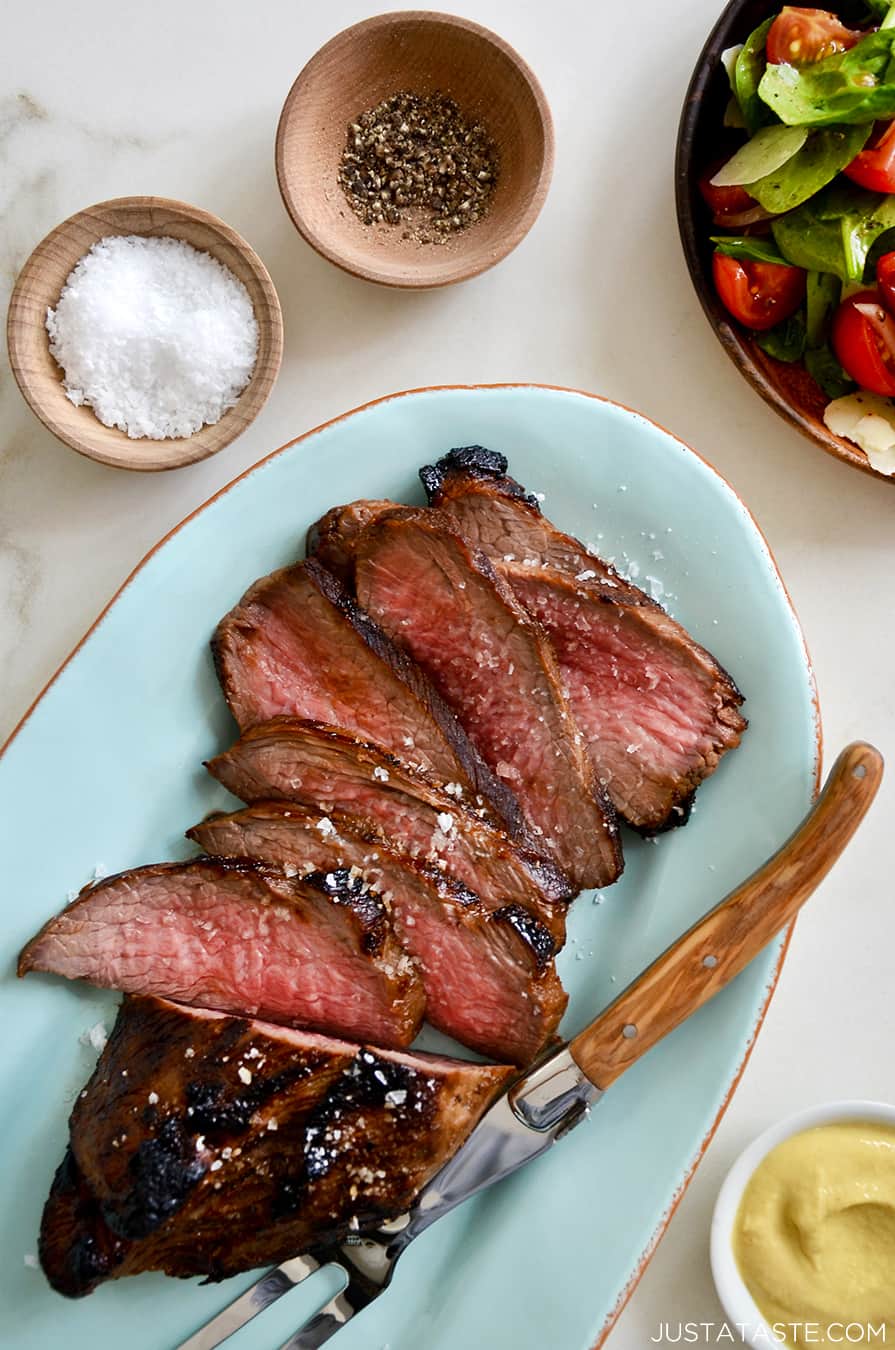
Finally, I pulled the tri-tip out of the air fryer and placed it on a cutting board. I tented it loosely with foil and let it rest for about 10 minutes. This is crucial, people! Don’t skip the resting step, or all those precious juices will run out.
After the agonizing wait, I sliced the tri-tip against the grain. And there you have it, perfectly cooked, juicy, and flavorful air fryer tri-tip. It was seriously good, and way easier than I expected. Definitely adding this to my regular rotation!


